Repairing a rotted window frame interior is an essential home maintenance task that preserves the structural integrity of your windows while improving the overall aesthetics of your interior. Wood rot occurs when moisture penetrates the wood, causing it to decay and weaken over time. This can result in drafts, water leaks, and even potential safety hazards if left untreated. Knowing how to properly repair a rotted window frame not only extends the lifespan of your window but also enhances energy efficiency and prevents further damage to surrounding walls. With the right tools, materials, and techniques, homeowners can effectively restore rotted wood frames and maintain a beautiful, functional window interior.
Understanding Window Frame Rot
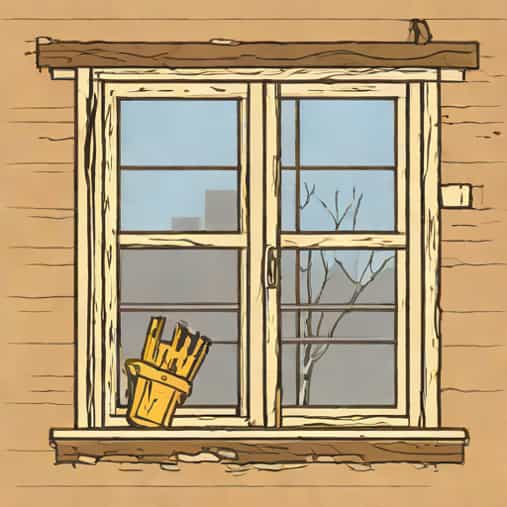
Before beginning the repair process, it is important to understand what causes window frame rot and how to identify it. Rotted wood is typically soft, discolored, and may crumble when touched. Moisture is the primary cause, often entering through leaks in caulking, damaged paint, or condensation around the window. Identifying the extent of the rot helps determine whether the frame can be repaired or if replacement is necessary.
Signs of Wood Rot
- Soft or spongy areas on the window frame when pressed with a screwdriver or fingernail.
- Discoloration, often darkened or lighter patches, compared to healthy wood.
- Peeling or bubbling paint around the affected area.
- Visible cracks, holes, or decay in the wood structure.
- Musty odors or signs of mold growth near the window frame.
Materials Needed for Repair
Gathering the proper tools and materials is crucial for a successful repair. Depending on the severity of the rot, you may need the following
- Wood filler or epoxy wood consolidant
- Chisel and putty knife
- Sandpaper of various grits
- Wood hardener
- Primer and paint suitable for interior use
- Protective gloves and safety glasses
- Cloth or brush for cleaning debris and dust
Step-by-Step Guide to Repairing Rotted Window Frames
Repairing a rotted window frame involves removing the decayed wood, treating the affected area, and restoring the surface with filler and paint. Follow these steps to ensure a durable and aesthetically pleasing repair.
Step 1 Remove Damaged Wood
- Start by inspecting the frame to identify all rotted areas.
- Use a chisel, scraper, or putty knife to carefully remove soft, decayed wood.
- Ensure that only healthy wood remains to provide a solid foundation for the repair.
- Clean the area thoroughly, removing any dust or debris that could interfere with adhesion.
Step 2 Apply Wood Hardener
Wood hardener strengthens the remaining wood and prepares it for filler application.
- Apply a generous amount of wood hardener to the exposed area using a brush.
- Allow it to penetrate the wood fully according to the manufacturer’s instructions.
- This step reinforces weakened fibers and ensures the filler bonds effectively.
Step 3 Fill the Rotted Area
- Mix epoxy wood filler or putty according to the product instructions.
- Use a putty knife to apply the filler to the rotted area, pressing it firmly into any gaps or holes.
- Smooth the surface to match the surrounding frame as closely as possible.
- Allow the filler to cure completely. This may take several hours depending on the product.
Step 4 Sand the Repaired Area
- Once the filler has cured, use sandpaper to smooth the surface.
- Start with a coarser grit to shape the filler, then finish with finer grit for a smooth finish.
- Remove any dust with a clean cloth to prepare the surface for priming and painting.
Step 5 Prime and Paint
- Apply a coat of primer to the repaired area to seal the wood and provide a uniform base for paint.
- Allow the primer to dry completely before painting.
- Apply interior paint that matches the existing window frame color, using multiple thin coats for a professional finish.
- Allow each coat to dry fully before applying the next.
Preventing Future Window Frame Rot
Once the repair is complete, take steps to prevent rot from recurring. Moisture management and routine maintenance are key to preserving window frames.
Tips for Prevention
- Inspect caulking and seals around windows regularly, replacing any that are cracked or worn.
- Keep the area around windows dry by addressing leaks and condensation.
- Apply a protective layer of paint or sealant to all interior and exterior wood surfaces.
- Ensure proper ventilation in rooms with high humidity to prevent moisture accumulation.
- Regularly check window frames for early signs of damage and address issues promptly.
When to Consider Full Window Frame Replacement
In some cases, the rot may be extensive or the frame structurally compromised, making repair insufficient. Signs that full replacement may be necessary include
- Large sections of the frame are decayed or weakened.
- The window is no longer functioning properly, such as difficulty opening or closing.
- Repeated rot occurs despite previous repairs.
- Structural integrity of surrounding walls is affected by water damage.
Repairing a rotted window frame interior is a manageable task that can restore the functionality and appearance of your windows. By carefully removing decayed wood, applying wood hardener, filling gaps, sanding, and painting, homeowners can extend the life of their window frames and prevent further damage. Routine maintenance and moisture control are essential to avoiding future rot and maintaining a healthy, attractive interior. Understanding when repair is sufficient versus when full replacement is needed ensures that your window frames remain durable and visually appealing for years to come. Following these steps allows you to confidently address rotted window frames and maintain a safe and comfortable home environment.