In emergency situations where heavy bleeding occurs, knowing how to use a tourniquet properly can make the difference between life and death. A tourniquet is a crucial first-aid tool designed to control severe hemorrhage, especially when bleeding from a limb cannot be stopped by direct pressure alone. While it’s a simple device in concept, improper use can cause further harm. Therefore, understanding the correct application, timing, and placement of a tourniquet is vital for anyone involved in first response, outdoor adventures, or hazardous work environments. This knowledge is also valuable for everyday citizens who want to be prepared for unforeseen emergencies.
Understanding What a Tourniquet Is
A tourniquet is a tightly bound device typically a strap, band, or belt used to compress blood vessels and stop blood flow to a limb. It is most commonly used on arms or legs to control life-threatening arterial bleeding. Tourniquets are frequently found in tactical, military, and emergency medical kits, and are increasingly being recommended for inclusion in civilian first aid gear.
Common Types of Tourniquets
- CAT (Combat Application Tourniquet): Widely used in military and EMS settings.
- SOF-T: Durable and preferred by tactical professionals.
- RATS (Rapid Application Tourniquet System): Compact and easy to use.
- Improvised tourniquets: Made using belts, scarves, or fabric with a stick or rod.
Each type has its own advantages, but all serve the same essential purpose: to stop the flow of blood until professional help is available.
When to Use a Tourniquet
A tourniquet should be used when severe bleeding cannot be controlled with direct pressure, especially when the bleeding is rapid, pulsating, and comes from an artery. It is appropriate in cases such as car accidents, machinery injuries, gunshot wounds, or natural disasters.
Signs That a Tourniquet Is Needed:
- Blood is spurting or flowing rapidly from a limb
- Direct pressure fails to stop the bleeding
- The wound is too large or deep to be treated with bandages alone
- You’re in a situation where time or resources are limited
Remember, a tourniquet is a last resort, but in the right situation, it can save a life when seconds matter.
Step-by-Step Guide to Using a Tourniquet
Proper tourniquet application is key to preventing blood loss without causing additional damage. Follow these steps carefully to apply a tourniquet correctly:
Step 1: Identify the Source of Bleeding
Before applying anything, locate the bleeding wound. Remove clothing if necessary and assess the injury. Ensure the bleeding is coming from an arm or leg, as tourniquets are not used on the neck, torso, or head.
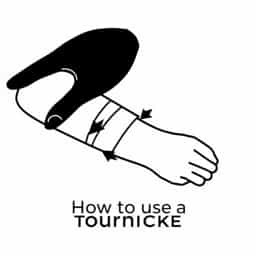
Step 2: Apply the Tourniquet Above the Wound
Place the tourniquet 2 to 3 inches above the bleeding site. If the exact wound location is unclear or if bleeding is very high on the limb, place the tourniquet as high as possible (known as high and tight). Avoid placing it over joints like the elbow or knee, which can reduce its effectiveness.
Step 3: Tighten Until Bleeding Stops
Tighten the strap or band until the bleeding stops completely. The limb may become pale or cold this is expected. If you are using a windlass-style tourniquet (like the CAT or SOF-T), twist the rod to apply extra pressure, then secure it in place.
Step 4: Record the Time of Application
Use a pen or marker to write the time the tourniquet was applied, ideally on the tourniquet itself or directly on the patient’s skin. This is critical information for medical responders, as prolonged tourniquet use can lead to tissue damage.
Step 5: Do Not Remove the Tourniquet
Once applied, do not loosen or remove the tourniquet until medical professionals take over. Removing it prematurely can lead to further blood loss or clot displacement, which can be life-threatening.
Improvised Tourniquet Tips
In situations where a commercial tourniquet is unavailable, you can improvise one using common materials. However, an improvised tourniquet must still meet certain standards to be effective.
Materials You Can Use:
- A wide strip of cloth (at least 1 inch wide)
- A belt or strong rope
- A stick, pen, or sturdy rod for twisting
Wrap the material above the wound and tie a knot. Insert the rod, twist to tighten, and secure it to maintain pressure. Always ensure the makeshift tourniquet is tight enough to stop bleeding, but not so tight that it causes further injury from crushing the limb.
Common Mistakes to Avoid
Incorrect use of a tourniquet can lead to complications such as nerve damage, tissue death, or failed hemorrhage control. Being aware of common mistakes can help ensure the tool is effective when needed.
Avoid These Errors:
- Placing the tourniquet too low on the limb
- Using a narrow material that cuts into the skin
- Not applying enough pressure to stop bleeding
- Removing the tourniquet before EMS arrives
- Failing to record the application time
By avoiding these errors, you significantly increase the chances of saving a life while minimizing long-term damage to the limb.
Aftercare and Medical Follow-Up
Even if a tourniquet successfully stops bleeding, it is only a temporary solution. The injured person must be taken to a hospital as soon as possible. Once there, professionals will assess tissue damage, infection risk, and the need for surgery or further intervention.
Tourniquet-related injuries can be serious, especially if left in place for too long (generally more than 2 hours). Monitoring and timely medical treatment are essential parts of the recovery process.
Training and Practice
Like any emergency skill, applying a tourniquet is best learned through hands-on training. While reading about it is helpful, practicing the technique builds confidence and muscle memory. Many first aid courses and CPR certifications now include tourniquet use as part of their curriculum.
Consider the following to improve your readiness:
- Take a certified first aid or trauma course
- Carry a tourniquet in your car, backpack, or first aid kit
- Practice on training dummies or with mock injuries
Knowing how to use a tourniquet can save lives during emergencies involving severe limb bleeding. From recognizing when it’s needed to applying it correctly and avoiding common mistakes, every step matters. Whether you carry a commercial tourniquet or rely on improvisation, the principles of proper use remain the same: act quickly, apply it high and tight, and get medical help without delay. Tourniquets are not just tools for soldiers or medics they’re vital for anyone prepared to respond to life-threatening injuries with confidence and skill.