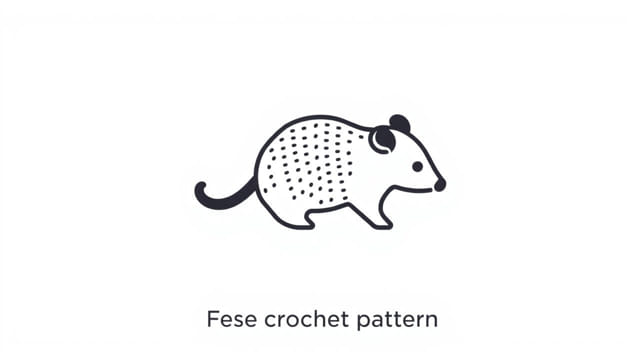
If you’re passionate about crochet and love making unique animal figures, a free opossum crochet pattern can be a delightful project to dive into. Whether you’re creating a whimsical woodland creature collection or just looking for a new challenge in amigurumi, an opossum is a great choice. With its long tail, round body, and distinctive features, this little marsupial offers a fun mix of shapes and textures to bring to life with yarn. This guide introduces a simple yet detailed approach to crocheting your very own opossum using accessible stitches and affordable materials.
Understanding the Basics of Opossum Amigurumi
Why Crochet an Opossum?
Opossums may not be the first animal that comes to mind when thinking of cute crochet projects, but they have a quirky charm. Their big ears, pointy nose, and curling tails give them a lot of personality. A free opossum crochet pattern allows crafters to experiment with different colors, stitch techniques, and detailing, making it a versatile pattern for all skill levels. Plus, they make great gifts for animal lovers or unique nursery decor.
What You’ll Need
To complete your opossum, gather these essential materials:
- Worsted weight yarn in light gray, white, and black
- 3.5 mm (E) crochet hook
- Polyester stuffing
- Stitch marker
- Safety eyes (6mm or 9mm)
- Yarn needle
- Scissors
You may also want to add a bit of pink yarn for the nose and inner ears, depending on how realistic or stylized you want your opossum to look.
Step-by-Step Free Opossum Crochet Pattern
1. Crochet the Head
The head is typically worked in continuous rounds using single crochet stitches. Begin with a magic ring and increase gradually to form a cone-like shape for the snout. After reaching the desired width, maintain that stitch count to build the head length. Insert the safety eyes before closing the head and stuff it firmly with fiberfill.
2. Make the Body
The body will have a slightly oval, plump shape. Start with a magic ring again and increase stitches every few rounds to form the base. As you move upward, stop increasing and crochet evenly to build height. Near the top, begin decreasing gradually to taper toward the neck. Don’t forget to stuff the body as you go.
3. Crochet the Ears and Nose
Opossum ears are simple semi-circles made from black or pink yarn. Crochet two small rounds, then fold and stitch them to the head. The nose can be a tiny sphere or a small embroidered bump at the tip of the snout. A touch of blush or a French knot adds character.
4. Add Arms and Legs
For limbs, work small cylindrical shapes and lightly stuff them. Position the arms just below the neck and legs at the bottom sides of the body. Attach securely using a yarn needle and matching yarn. Be sure to keep symmetry for a balanced, stable plush.
5. Tail Construction
One of the most recognizable features of an opossum is its long, curling tail. Use light pink yarn to create a tubular tail that starts thick and gradually narrows. A wire can be inserted inside the tail to help it hold a curled shape. Sew the tail to the lower back of the body for the signature opossum look.
Tips for Success
Keep Your Stitches Tight
Amigurumi requires tight stitches to prevent stuffing from showing through. If your work is too loose, consider using a smaller hook size or adjusting your tension. This is especially important for small details like the snout and paws.
Use Stitch Markers
Working in the round can get confusing quickly. Use a stitch marker to mark the beginning of each round. This helps maintain the pattern and keeps your decreases and increases in the correct place.
Customize Your Opossum
Don’t be afraid to get creative. Add stripes, use different colors, or experiment with fuzzy yarn to give your opossum texture. You can even crochet a little accessory, like a scarf or hat, for added personality.
Common Mistakes and How to Avoid Them
Misplacing Facial Features
Facial placement makes a big difference in the final look. Before attaching eyes or sewing on the nose, hold them in place temporarily with pins and step back to check the symmetry. Adjust as needed before finalizing.
Incorrect Tail Positioning
Ensure the tail is centered at the back. A misaligned tail can make the opossum look off-balance. If you’re adding a wire, be cautious not to make it too stiff it should be bendable yet supportive.
Overstuffing the Body
Too much stuffing can stretch stitches and distort the shape. Add small amounts at a time and shape the body as you go. The goal is a firm but squishy plush.
Using Your Finished Crochet Opossum
Gift Ideas
This crochet project is a wonderful handmade gift for children, animal lovers, or collectors of amigurumi. It’s small enough to sit on a shelf, be carried in a bag, or accompany a themed crochet set.
Educational Use
A crocheted opossum can also be used in educational settings, especially in wildlife education or storytelling activities. Its soft, durable design makes it a safe and engaging learning tool.
Charity and Community
Many crocheters donate handmade toys to hospitals, shelters, or charities. Be sure to use child-safe materials (especially stitched eyes instead of safety eyes for infants) if planning to gift your opossum to a child or donate it to an organization.
Creating a free opossum crochet pattern project is both enjoyable and rewarding. It allows for a blend of creativity and skill, and the finished result is sure to bring a smile to anyone’s face. From the realistic design of the tail to the charming ears and snout, this little creature makes for a fun addition to any amigurumi collection. With some yarn, patience, and imagination, you can transform simple stitches into a lifelike opossum you’ll be proud to show off or give as a gift. Happy crocheting!