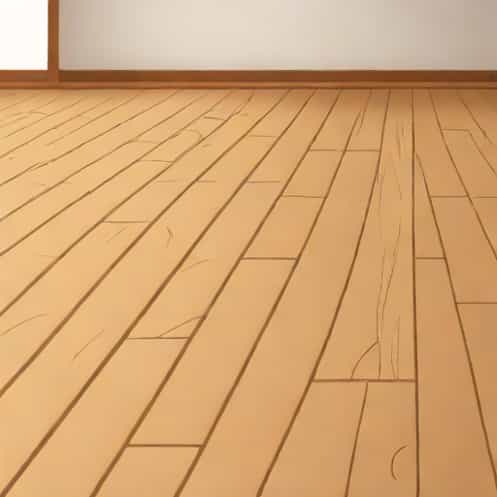
Hearing a floorboard creak underfoot can be charming in an old house, but when every step echoes through the hallway, it becomes frustrating. Creaky floorboards are a common problem in many homes, whether they’re made of solid wood or covered in laminate. The sound occurs when parts of the flooring rub together due to movement, moisture changes, or loose fasteners. Fortunately, getting rid of creaky floorboards doesn’t always require major renovation. With the right knowledge, tools, and patience, you can fix the issue yourself and restore peace and quiet to your living space.
Understanding Why Floorboards Creak
Before fixing the noise, it’s important to know what causes it. Creaks often develop over time as homes settle or materials expand and contract. Understanding the root cause will help determine the best solution.
Main Causes of Creaky Floorboards
- Loose Nails or ScrewsWhen nails or screws holding the boards loosen, the floor shifts slightly, creating friction and squeaks.
- Gaps Between BoardsTemperature and humidity changes can cause wood to shrink or swell, leaving tiny gaps that produce creaks when stepped on.
- Subfloor MovementIf the subfloor separates from the joists beneath, both layers can rub against each other, producing noise.
- Wear and TearOver time, constant pressure and use weaken the fasteners and materials, especially in high-traffic areas.
Identifying which of these problems applies to your floor will make it easier to decide how to get rid of the noise effectively.
Locating the Source of the Creak
Finding the exact spot where the sound originates is the first and most crucial step. Walk slowly across the floor and listen carefully. Have someone else move around while you stay below, if possible, to pinpoint the area from underneath. Mark the noisy sections with masking tape or chalk for easy identification later.
Tips for Finding the Creak
- Step lightly and use your full weight on one foot at a time.
- Listen for differences in sound pitch-tighter boards produce a higher squeak.
- If accessible, check the underside of the floor through the basement or crawl space.
- Look for signs of movement, loose nails, or small gaps between boards.
Once you’ve located the problem areas, you can move on to targeted repairs rather than fixing the entire floor unnecessarily.
Simple Fixes for Creaky Floorboards from Above
If you can access the creaky area from the top of the floor, several easy fixes can help eliminate the sound without removing boards or replacing parts of the floor.
1. Tighten the Floorboards
The simplest way to fix loose boards is to secure them more firmly. Use flooring screws designed for wood floors, and drive them carefully into the joist beneath. This holds the board tightly in place and prevents friction that causes creaks. If you prefer not to damage the surface, special breakaway screws are available that sink below the surface and snap off, leaving no visible head.
2. Apply Graphite or Talcum Powder
Sometimes, the creak is due to boards rubbing together rather than movement against the joist. In this case, sprinkling powdered graphite, baby powder, or talcum powder between the boards can help. The powder acts as a lubricant, reducing friction and silencing the noise. Use a soft brush to work the powder into the gaps and wipe off any excess afterward.
3. Use Construction Adhesive
If you suspect that movement between the floor and subfloor is the problem, injecting a small amount of construction adhesive between the layers can stop the motion. Use a caulking gun to apply the adhesive along the seams, then step on the area to spread it evenly. Allow it to dry completely before walking on it again.
Fixing Creaks from Below the Floor
If you have access to the underside of your floor-such as in a basement or crawl space-fixing creaky floorboards becomes easier and less invasive. You can directly address the joists and subfloor connections without affecting the visible flooring.
1. Insert Wooden Shims
When there’s a small gap between the joist and subfloor, inserting a wooden shim can eliminate movement. Gently tap a thin wood shim coated with wood glue into the gap until it fits snugly. Avoid forcing it too hard, as that could lift the floorboard above.
2. Reinforce with Screws
Using short wood screws, drill upward through the joist into the subfloor. This pulls the two layers tightly together, reducing friction. Make sure the screws are short enough not to penetrate the visible flooring above. It’s best to drive the screws at a slight angle for a stronger hold.
3. Add Bridging or Blocking
If the joists themselves are flexing and causing movement, adding wooden blocking or cross-bridging between them can increase stability. This structural reinforcement minimizes bounce and noise across a larger area.
Dealing with Different Floor Types
The right fix for creaky floors depends on the type of flooring material. Each material reacts differently to temperature, humidity, and wear.
Wood Floors
Wood is the most common surface to creak due to its natural flexibility and reaction to humidity. Regular maintenance, such as controlling indoor moisture and keeping the boards clean, helps prevent future squeaks. Always use wood-specific adhesives and fasteners when repairing wooden floors.
Laminate Floors
Laminate floors usually creak because the underlayment has shifted or because the boards aren’t fully locked together. Re-seating the laminate panels and ensuring proper spacing during installation can often fix the issue. Avoid using excessive adhesive, as it can damage the locking mechanism.
Carpeted Floors
For carpeted areas, the creak usually comes from the subfloor beneath. You can fix this by driving specialized screws through the carpet into the subfloor without removing the carpet itself. Tools like squeak no more kits are available for this exact problem, leaving minimal visible marks.
Preventing Future Creaks
Once you’ve fixed the problem, you can take several measures to ensure your floors stay quiet in the long term. Preventative maintenance saves time and prevents damage before it becomes noticeable.
- Keep indoor humidity levels between 40% and 60% to prevent wood expansion and contraction.
- Check for loose nails or screws once a year, especially in high-traffic areas.
- Clean and inspect flooring regularly to spot early signs of wear or separation.
- Use area rugs or floor mats to reduce pressure on certain areas of the floor.
- Apply floor-safe lubricants periodically between joints if minor squeaks reappear.
When to Call a Professional
While most creaky floor issues can be handled with basic DIY tools, some situations may require professional help. If the creaking is widespread, accompanied by sagging floors, or involves structural damage to joists or beams, it’s wise to consult a flooring expert or carpenter. They can assess whether there’s a deeper issue such as moisture damage, pest infestation, or weakened support structures.
Getting rid of creaky floorboards doesn’t have to be an overwhelming task. Whether the problem comes from loose fasteners, gaps, or shifting subfloors, understanding the cause is half the battle. With the right approach-whether tightening screws, using lubrication, or reinforcing from below-you can restore your floor’s stability and silence the annoying creaks once and for all. Regular maintenance and mindful care will keep your home quieter, more comfortable, and free from those unwanted noises that remind you of every step you take.