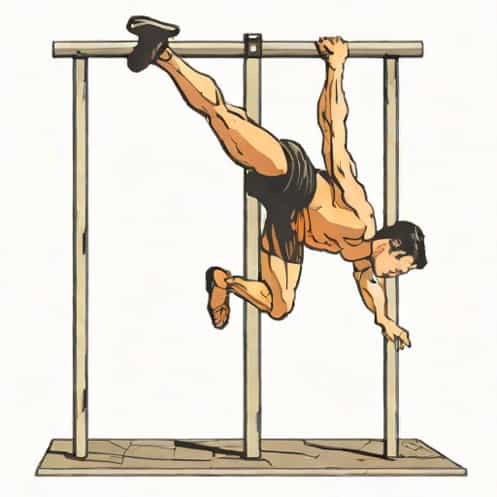
Learning how to handstand in calisthenics can feel intimidating at first, but the process becomes far more manageable when you break it into small, consistent steps. A handstand is not just a show of strength; it also requires balance, coordination, and body awareness. Many beginners think they need exceptional arm strength to succeed, but proper technique and controlled progression are far more important. By understanding the fundamentals, practicing regularly, and building confidence upside down, you can move closer to a stable and controlled calisthenics handstand that feels natural and rewarding.
Understanding the Calisthenics Handstand
The handstand is a foundational skill in calisthenics training. It improves balance, strengthens the core, and increases shoulder stability. Unlike gymnastics, which may focus on dynamic handstands, calisthenics emphasizes slow control and body alignment.
Why Handstands Matter
Handstands help develop essential skills that carry over to other exercises such as push-ups, planches, and overhead movements. They also improve posture and create better awareness of how the body moves as a single unit.
Body Alignment Principles
A good handstand relies on maintaining a straight line from the wrists to the ankles. This reduces strain and helps you balance more effectively.
-
Wrists stacked below shoulders
-
Core tight and ribs tucked
-
Legs straight and squeezed together
-
Pointed toes to encourage upward length
Preparing Your Body for Handstands
Before attempting a freestanding handstand, developing adequate strength and mobility in key areas is important. Preparation builds confidence and prevents injury.
Strength Requirements
You do not need extreme strength, but you should feel comfortable supporting your body weight.
-
Shoulder stability from exercises like pike push-ups
-
Core strength from hollow body holds
-
Wrist endurance from weight-bearing drills
Mobility Requirements
Improving shoulder and hamstring mobility makes alignment easier.
-
Shoulder flexion stretches
-
Hamstring lengthening drills
-
Thoracic spine mobility exercises
Essential Handstand Progressions
Progressions help you build skills gradually, reducing frustration and improving consistency. Calisthenics training relies heavily on step-by-step improvement.
1. Wall Walks
Wall walks help you get comfortable supporting weight upside down while strengthening the shoulders and core. Start by facing the floor, feet climbing the wall behind you, and hands walking closer to the wall.
2. Wall Handstand Holds
This teaches balance and alignment. Practice with your chest facing the wall for better positioning. Aim to hold for increasing intervals to build endurance.
3. L-Shaped Handstand
Using a raised surface like a box or bench, create a 90-degree angle with your hips. This helps you learn balance while reducing pressure compared to a full vertical position.
4. Kick-Ups
Kick-ups help you enter the handstand. Controlled kick-ups build confidence and teach you to find the balance point rather than relying on momentum.
5. Freestanding Handstand Attempts
Once you can hold a wall handstand with proper form, begin attempting freestanding handstands. Focus on short, controlled holds rather than long attempts.
Mastering Balance in a Handstand
Balancing upside down requires fine motor adjustments. Understanding how your body reacts to movement helps you stay in control.
Finger Control
Your fingers act as brakes and stabilizers. Grip the ground lightly so you can adjust as needed. If you fall forward, press through your fingertips; if you fall backward, release slightly.
Shoulder Engagement
Push tall through the shoulders to stabilize the body. Imagine lifting your body upward rather than sinking into your joints.
Hip and Leg Position
Keeping your legs squeezed together improves balance because it reduces unnecessary movement. Engaging your glutes also helps maintain a straight line.
Breathing and Focus
Many people hold their breath when learning how to handstand, but steady breathing improves relaxation and control. A calm mind leads to steadier balance.
Breathing Tips
Use slow, controlled breaths. Even small movements caused by shallow breathing can affect balance, but panic tends to make it worse. Staying relaxed helps your body adapt naturally.
Mental Focus
Focus on one stable point on the floor. This reduces distractions and anchors your sense of balance, especially during freestanding attempts.
Common Mistakes and How to Fix Them
Every beginner faces similar challenges. Identifying and correcting mistakes early helps you progress faster and avoid frustration.
Arching the Back
Overarching occurs when the ribs flare and the core disengages. Practicing hollow body drills can significantly improve alignment and reduce back strain.
Kicking Too Hard
Excessive force causes you to overshoot the balance point. Aim for gentle kick-ups with control rather than height.
Not Engaging the Shoulders
Letting your weight sink into your shoulders makes balancing harder. Focus on pushing tall through your hands and maintaining solid shoulder activation.
Neglecting Wrist Strength
Wrist fatigue is common, but consistent wrist conditioning prevents discomfort. Include wrist warm-ups and stretching in every session.
Training Routine for Handstand Progress
A structured routine helps you stay consistent. Practicing a little every day is better than training intensely only once in a while.
Sample Routine
-
Warm-up wrist prep, shoulder mobility, light core activation
-
Wall holds 3-5 sets of 20-40 seconds
-
L-handstands or pike holds 3 sets of 20 seconds
-
Kick-up practice 5-10 controlled attempts
-
Freestanding practice short balance holds
-
Cooldown stretching and deep breathing
Building Confidence Upside Down
Learning to handstand requires mental courage as much as physical ability. Feeling comfortable upside down takes repetition and gradual exposure.
Overcoming Fear
Start by practicing near a wall or with a soft surface. Fear decreases as your body becomes familiar with the sensation of inversion.
Practicing Consistently
Short daily practice sessions are more effective than occasional long ones. Even five minutes a day can build significant progress over time.
Celebrating Small Wins
Small improvements like straighter alignment, longer holds, or softer kick-ups are signs of steady growth. Acknowledging them keeps motivation high.
Advanced Tips for Calisthenics Handstands
Once you have a stable handstand, you can begin refining control or progressing to more advanced variations.
Handstand Tucks
Bringing your knees to your chest helps strengthen shoulder control and deepens body awareness.
Handstand Walking
This variation focuses on shifting weight from one hand to the other. It requires strong wrists and confidence in balancing.
Press to Handstand
An advanced movement where you lift into a handstand using only strength and control rather than a kick-up.
Learning how to handstand in calisthenics is a journey that requires patience, consistent practice, and mindful technique. By focusing on alignment, strength, balance, and gradual progression, you can build a stable handstand that feels effortless. Each step you take strengthens not only your body but also your confidence in mastering challenging skills. With time, understanding, and persistence, the handstand can become one of the most rewarding movements in your calisthenics training.